Natural Spring Centerpieces From Floral Experts
A round up of centerpiece ideas fit for a spring table (and how to create them at home)
Image: Cathy Graham
Springtime is arguably the best season for creating special centerpieces with what’s available. There is so much floral abundance just outside your door — from ubiquitous daffodils to lesser known self-propagating flowers like snowdrops.
I’ve always thought the best spring arrangements are ones that take their cues from nature. That’s precisely the inspiration behind these fresh floral creations shared by floral experts from both sides of the pond that would serve as fitting spring centerpieces. They’re attainable even if you don’t have a field in your backyard — we’ll show you how.
For each centerpiece idea below, I’ll breakdown what goes into creating them as well as a level of difficulty / faff (I’ve adopted this English term which translates to a pain in the neck / too much hassle for the reward) on a scale of 1-5 with 5 being the faffiest. I understand depending on the person or the timing, you might be looking for less faff for the desired outcome, and sometimes you might want to go all in no matter the faff. There are lovely centerpiece ideas for whatever mood you’re in.
Gathering Spring flowers for spring flower arranging
Every product is curated independently. Things you buy through our links may earn us a commission.
Image: Sense of Spencer
Spring Centerpiece Ideas
Moss Bundles
Level of difficulty / faff: 4. Because this centerpiece idea involves bulbs, including roots and dirt, and moss, it can be quite messy — both in making it and in displaying it on the table. There are tips below on how to minimize the faff.
What it is: Kokedama, which literally translates to ‘moss ball’, is a centuries old Japanese practice of taking the root of a plant and suspending it in a mud ball. Using a spring bulb in lieu of a mud ball wrapped in moss creates a distinctive spring centerpiece.
Who it’s from: Clive Nichols, a garden and flower photographer, voted 'Britain's best garden photographer' (here)
Where to put it: Spread the bundles around the dining table. You could cluster other bits of moss to look like ‘grass’ and decorate with chocolate eggs and jelly beans. After, the bundles could be moved outside to create visual interest on a patio or on a wall.
Clumps of snowdrop bulbs freshly dug from the earth
Wrapping pieces of moss around the bulb and holding it into place with pins
What you’ll need:
Spring bulbs like crocus, snowdrops, miniature daffodils, spring snowflake, fritillaries, broken up into clumps with roots and dirt at the base and flowers at the top
Sheet moss - you can get moss on Amazon or a local garden store, or harvest in the woods
2” greening pins to attach the moss
How to create:
Remove the bulbs from the pot.
Roughly cut a piece of moss that will be big enough to cover the roots of the bulb.
Moisten the moss with a spray bottle and wrap around the bulb. You may need to use greening pins to affix the moss.
Unused moss can be saved for another use; store in a plastic bag in a cool place (like a garage) and periodically spritz with water.
Care: Keep the moss moist by spritzing with a spray bottle.
Things to note from my experience:
It’s ok if the moss is clumpy (rather than sheets), just apply them around the root with the greening pins and they will blend together.
These can be messy! Would recommend putting these clusters on an outdoor table or a table without a tablecloth.
The clusters look best grouped together as a cluster in the center of the table rather than individual clumps.
A moss bundle as part of a Spring table scape (Image: Sense of Spencer)
Re-potted Bulbs
Level of difficulty / faff: 2. Once you have the few elements needed, this centerpiece is very easy to assemble.
What it is: Transplant a pot of spring bulbs to a decorative container. The bulbs will nourish the flower until it is spent. That means there’s no need to water – and the container you put them in doesn’t need a drainage hole, which gives you a little more flexibility to choose a vase or container of your choice.
Who it’s from: My mom, who is a life-long gardener and has worked for Martha Stewart arranging flowers (she was credited in her famous Weddings book)
Where to put it: I see two smaller containers anchoring either end of a dining room or one larger cachepot in the center. Apart from entertaining, these pots are lovely for decorating a table.
What you’ll need:
A pot of bulbs, like daffodil, grape hyacinth, paper whites for each container
Vase or container (even a bowl will do)
Sheet moss (see notes above)
How to create:
Pop the whole plant out of the plastic pot; roots, dirt and all. It should all stay together as a unit.
Drop the root ball into the container.
Cover the top of the dirt with sheet moss.
Care: Will last about 7-10 days. After that, you can throw the bulbs in the ground, and they’ll come back the next year!
Image: Sense of Spencer
Snowdrop Fairy Bowls
Level of difficulty / faff: 3. Assembling these mini arrangements is not hard — genuinely a kid could do it — but it is a bit painstaking especially if you are looking to create lots of them to go down a table as a centerpiece.
What it is: These little arrangements make use of the dainty flowers that pop up outside in the spring. The overall effect is quite whimsical.
Who it’s from: English florist, designer and author Willow Crossley (here)
Where to put it: These would be pretty dotted down a table, interspersed with other small containers filled with the same blooms or a contrasting variety. An individual arrangement is lovely on a bedside table.
What you’ll need:
Mini floral frogs (0.9” in diameter) - you can order from frogs from Amazon if you can’t find locally
Several candle holders, with a central column (for holding the candle) that’s wide enough to fit the frog and surrounded by a dish like this ceramic candle holder from Amazon OR if you don’t have, get resourceful, try with small bowls or votice candle holders
Cut stems of snowdrops, crocus or any other delicate spring flower you can find foraging outside, with as long a stem as you can cut
Optional: Sheet moss — not needed if using a cup or bowl
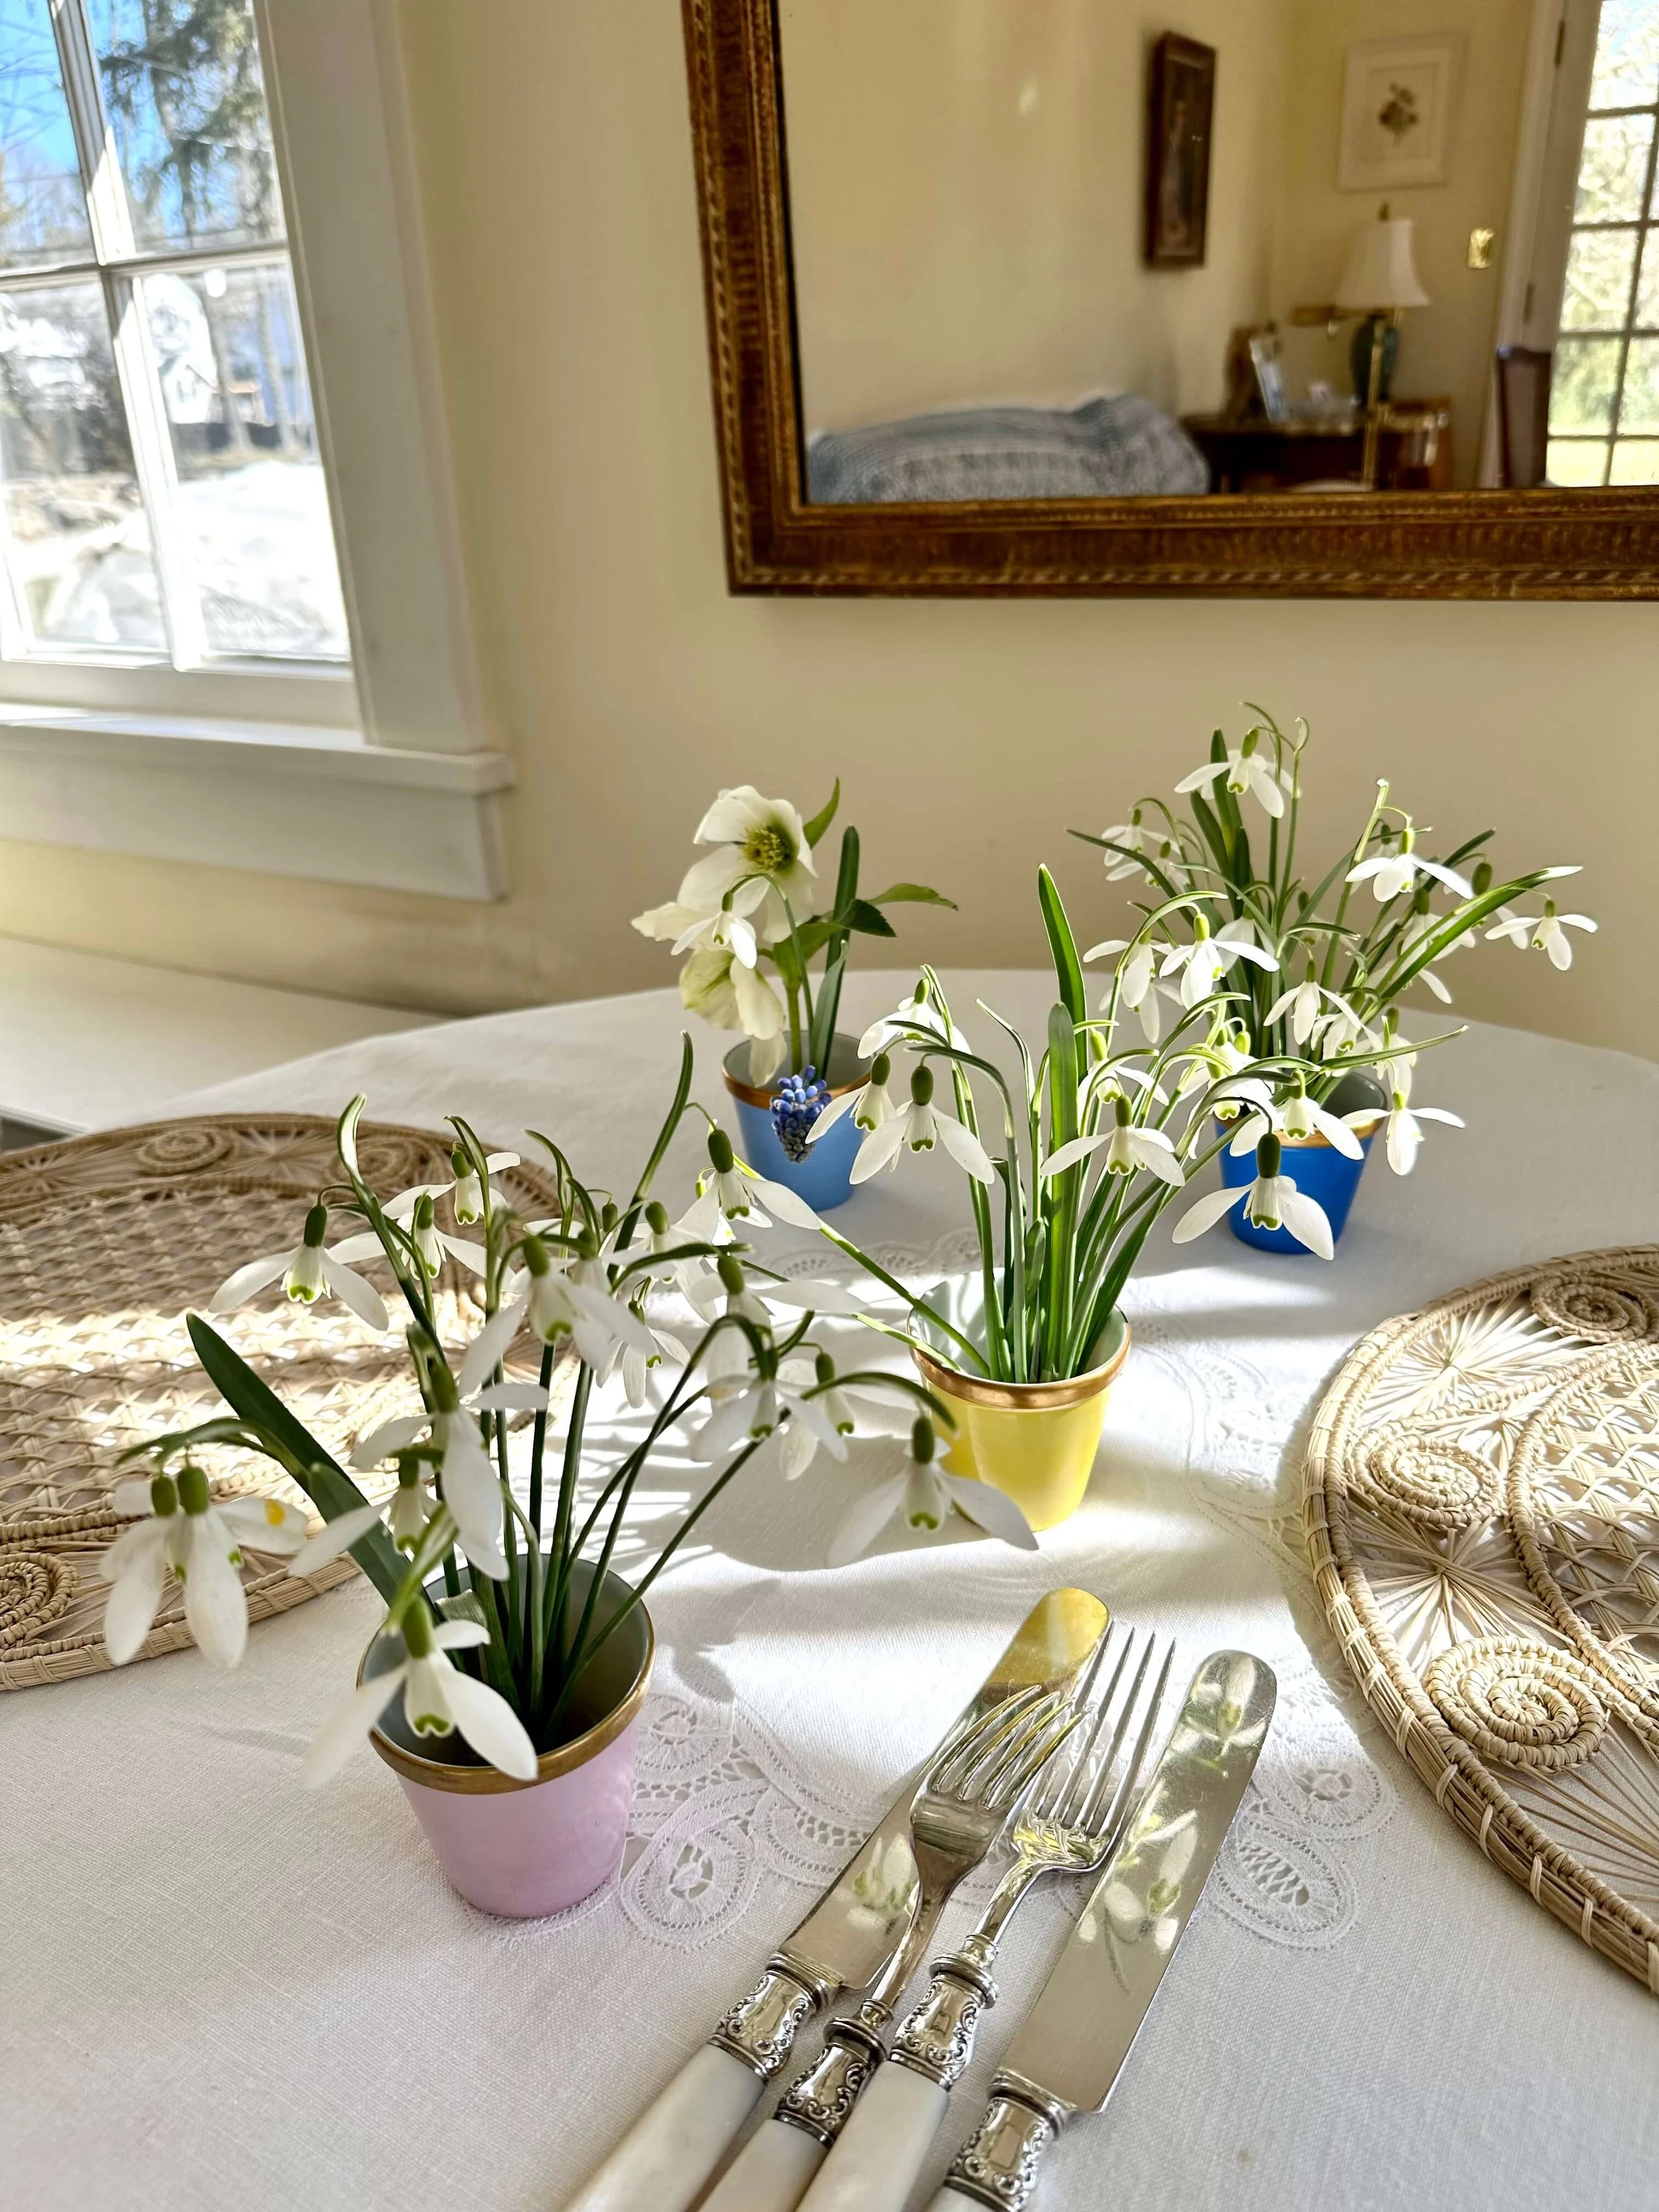
A table centerpiece consisting of three small pots holding snowdrops (Images: Sense of Spencer)
How to create:
Place the floral frog in the central part of the candle holder. Fill with water.
Gently stab the flower stems into the flog – they should be held in place, but it’s ok if they flop a bit. The idea is to create a natural arrangement.
Cut clumps of sheet moss and place into the dish around the central column. (The moss can help prop up some of the stems too.)
Care: Keep refilling the water to make sure the little buds have enough, but keep in mind this is the kind of arrangement you do for an event and shouldn’t expect to last too long after.
Things to note from my experience:
These are so easy! They just require a little patience as you need to place each tiny stem into the frog to create a fuller arrangement. I found it was easier to put them into the frog and then place it in the container.
As you can see, I did not use candle holders but instead these small Limoges cups. I liked that the depth of the cup basically hid the frog so there was no need for the moss.
The inner workings of the fairy bowls: stems stuck into a mini frog
The delicate snowdrop centerpiece add a whimsical touch to the table
Individual Stems in Vases
Level of difficulty / faff: 3. This centerpiece arrangement is ultimately easy to create; the hardest part is collecting multiple vases and flowers to go in them.
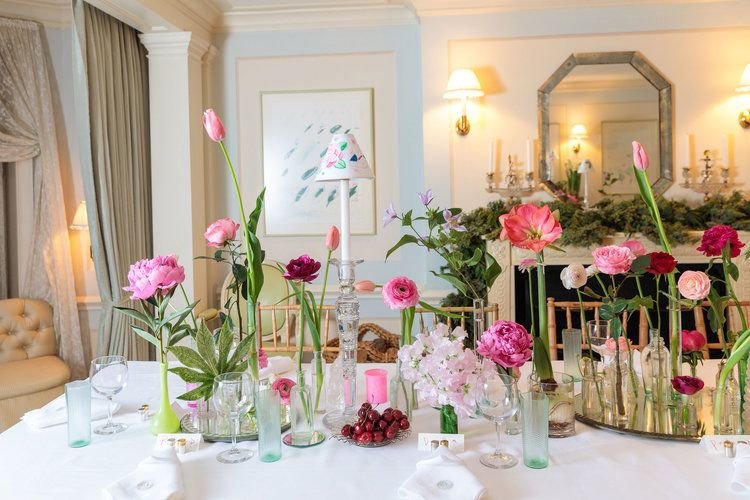
What it is: A grouping of small flower arrangements can sometimes have more impact than one larger arrangement, or they work well together. If you have a wilting arrangement, this idea is a good way to extend the life of flowers that are still healthy.
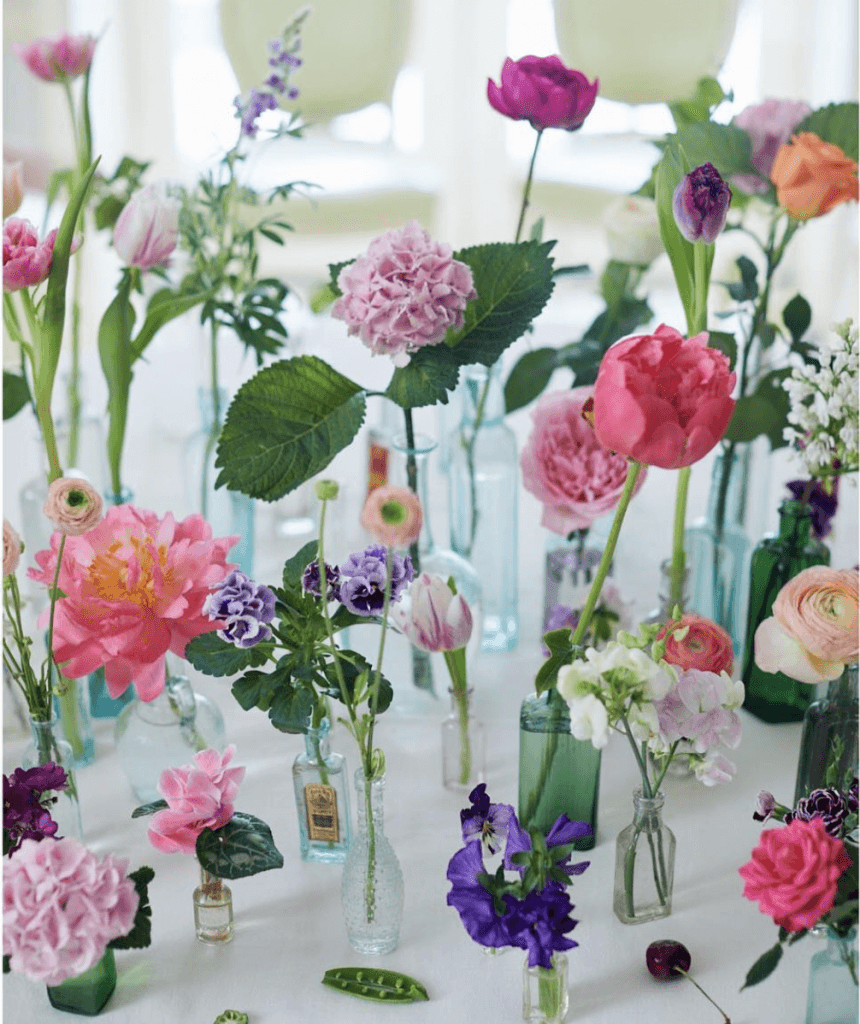
Who it’s from: New York-based illustrator and floral designer Cathy Graham (here)
Where to put it: Scatter the vases randomly on the table. Optional whether to have a central arrangement or not.
Cathy Graham’s centerpiece consists of vases in a range of colors and sizes
What you’ll need:
Lots of small containers: these can be vases, ceramic cups, glass bottles, basically anything that looks good that can hold water (I think it looks slightly better when the containers are similar but not identical – eg: all glass, but some in white, light green, aqua). Varying heights are ideal.
Cut flowers in season, like ranunculus, anemones, tulips, sweet peas (if you don’t have fresh clippings from your garden, flower shops can often sell you individual stems)
Floral scissors - Joyce Chen scissors work for me; the famous flower grower Floret recommends the ARS Needle Nose Pruner for use in the garden or flower arranging.
How to create:
Cut the stems two inches from the bottom with flower scissors (don’t use kitchen scissors because that can crush the stems and prevent water absorption) and put fresh water in the vases.
Put each flower in an individual container. The height of the stem would ideally be 1.5x the height of the container, but if it’s shorter that’s ok too. Match stems to heights of containers – so if you have a little shorty, find a petit container for it.
Care: Change the water when it starts to get cloudy and give the stems a fresh cut before putting back in the water.
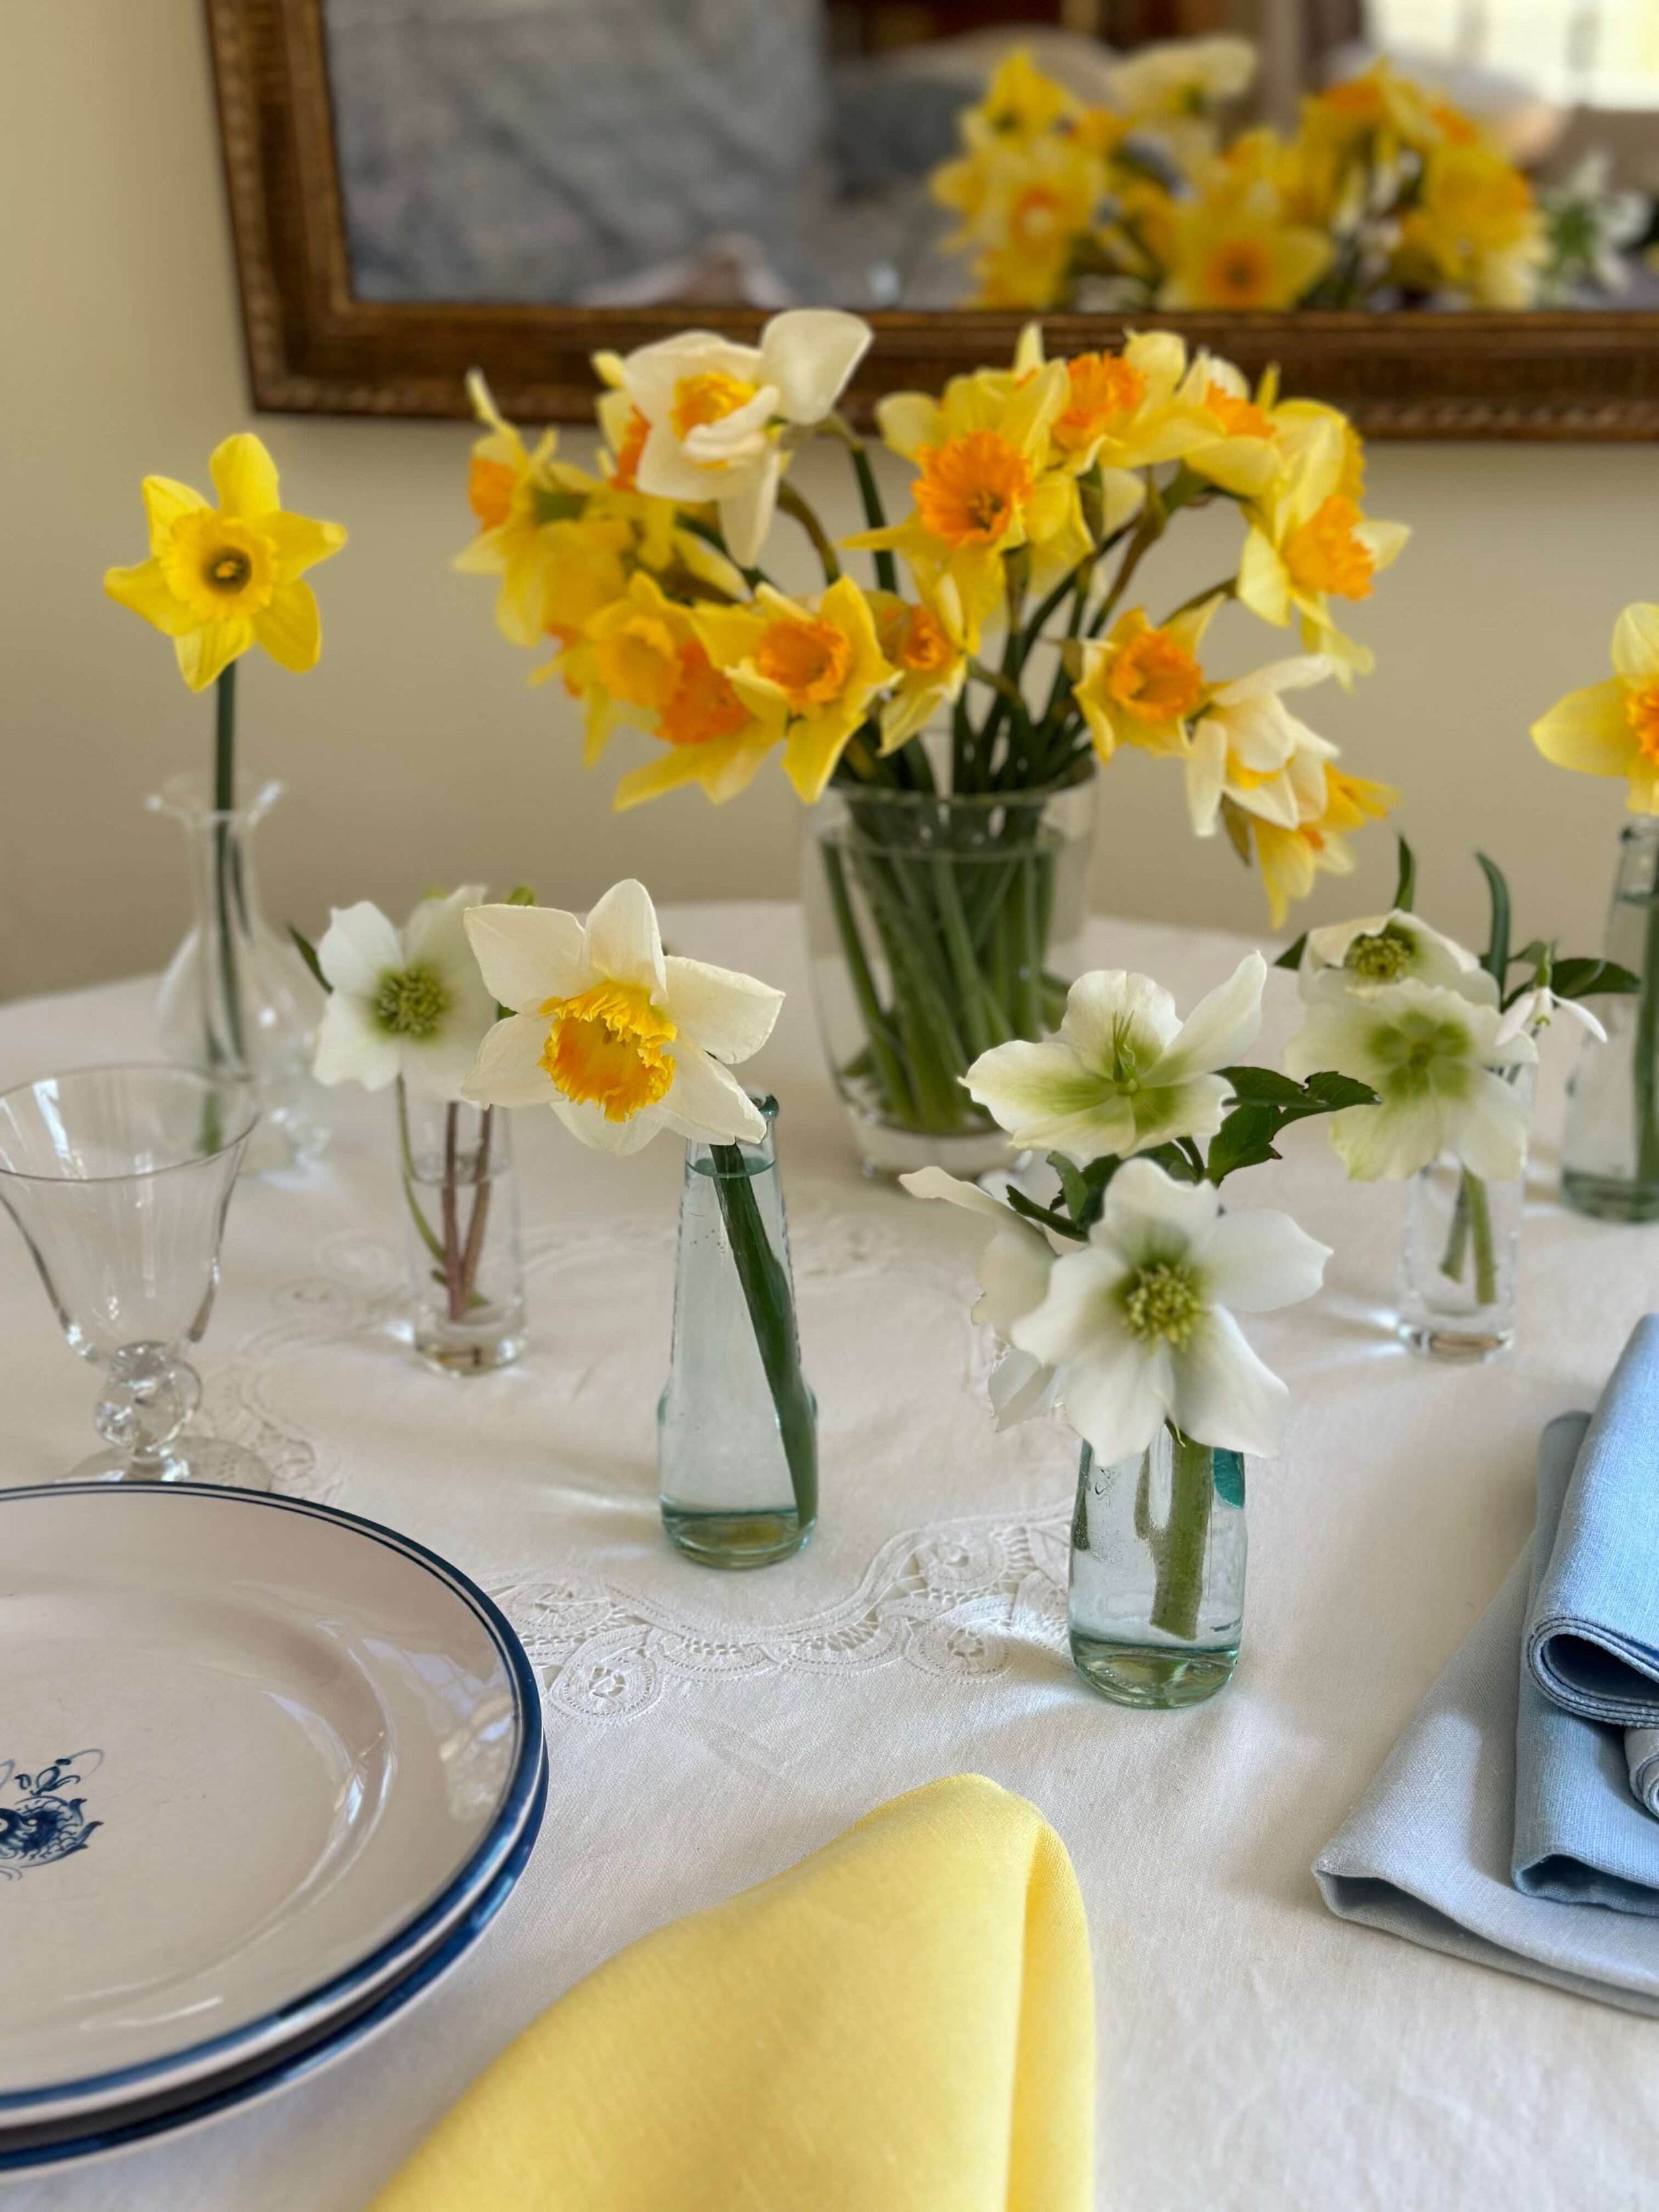
A table decorated with a cluster of vases in varying sizes
Small vases hold a single or a few stems of hellebores or daffodils
Pot-et-fleur
Level of difficulty / faff: 5. This is definitely a more involved arrangement to create, but also one of the most spectacular!
What it is: The pot-et-fleur was a Victorian art that combined a potted plant and cut flowers to create a wild, naturalistic floral arrangement. I love how this idea takes the stiffness out of the houseplants and makes sustainable use of abundantly growing perennial flowers.
Who it’s from: Gardens Illustrated, one of the UK’s leading publications on gardening (here)
Where to put it: This large arrangement would be ideal as a floral centerpiece on a dining room table, or could go on a buffet table. After the event, the arrangement can live on a side table in your primary living space or on your kitchen island.
A brilliant example of a pot-et-fleur created by @4jacquelinemills and shot by @jasoningram
A basket pot-et-fleur used as a centerpiece
What you’ll need:
A deep dish, a cachepot or a planter (without hole)
Expanded clay pellets
Potting soil appropriate for house plants
Houseplants like aspidistra, pia ivy, trailing peperomia, lemon button fern, maidenhair fern, asparagus fern, aiming for a mix of textures and heights — the number of plants depends on the size of the container
Three or so thin-necked vases or vials
Tall cut stems with a hanging flower like Solomon’s seals, blue bells, bleeding hearts, hellebores
Optional: sheet moss
How to create:
Line the container with expanded clay pellets to absorb excess water (and help prevent it from getting over-watered).
Add soil, then nestle the houseplants directly in the soil (without their pot). Sink the vases filled with water into the soil.
Intersperse the cut flowers in the vases.
If needed, use sheet moss to cover any bits of soil and add to the natural effect.
Care: Keep away from direct sunlight and mist regularly. Be careful not to overwater. Check the soil to see if it’s moist before adding more or use a water indication stick.
Things to note from my experience:
I used a round wooden basket, but I would recommend a rectangular container to give it more space to breath.
To make sure the ‘pot’ or plants don’t get lost, there should be enough to create some density, spilling out the sides.
I arranged some smaller flowers in the front, and I thought it looked a little busy. In the future I would make the plants the focus of the bottom and layer stemmed flowers to peak out above.
Dressed Up Pot
Level of difficulty / faff: 1. There is not much to creating this centerpiece at all.
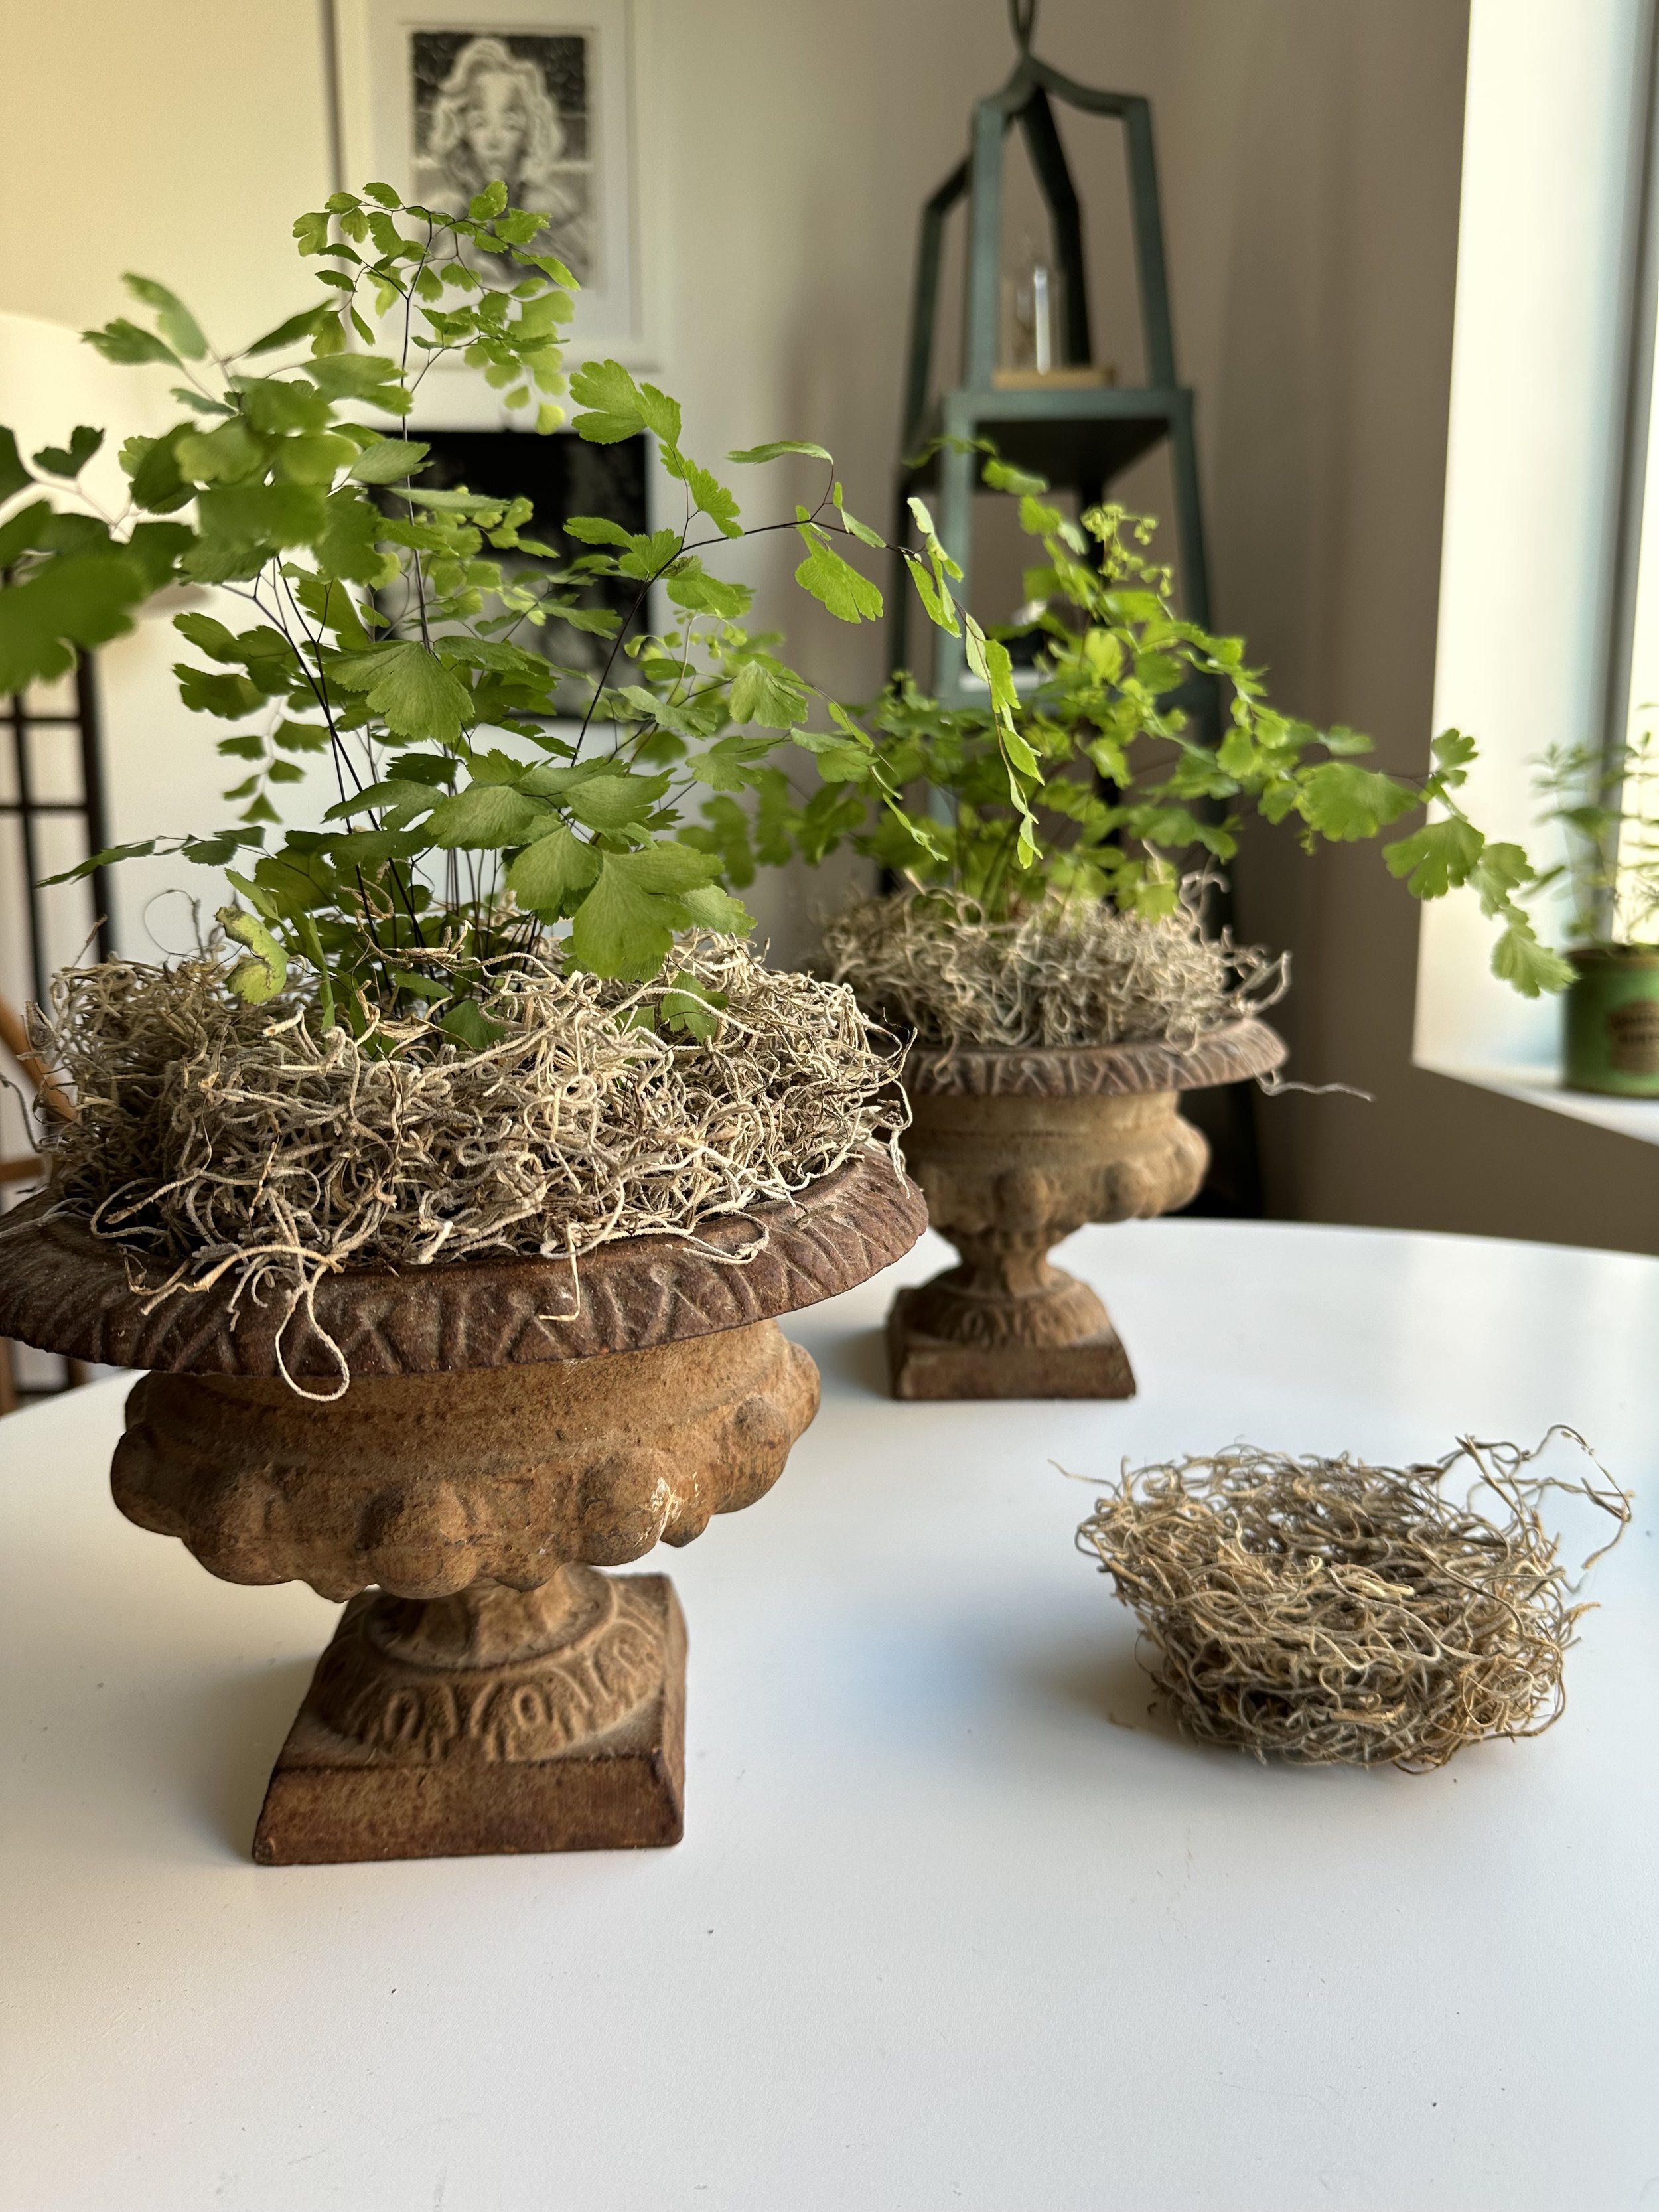
What it is: This idea comes down to simply putting a plastic pot with bulbs or plant in a decorative pot and dressing it up with Spanish moss. That’s it. Easy peasy. As a bonus, I like how the Spanish moss looks like grass from an Easter basket. I also used it to make a nest to decorate the table.
Who it’s from: Yours truly. I had these cast iron urns that I had always wanted to use, but the problem is that the urn isn’t that deep, so when I put a plastic pot inside, it would stick out the top. It wouldn’t be worth it to transplant anything into it. But one day I became determined to figure it out — then inspiration struck to use Spanish moss to conceal the pot.
Where to put it: If you have two containers, they can go at either end of a table as the centerpiece. One larger container in an oblong shape could go right in the center.
What you’ll need:
A pair of cachepots or urns, or an oblong planter
A plastic pot for each container (or a couple put together for a bigger one); size should be smaller than the container in circumference (it is ok if it’s taller as the moss will conceal); could do a spring bulb like tulips or hyacinth, or a soft plant like a fern
Spanish moss - I prefer a natural color, but you could make it more stylized with one of the colored mosses.
How to create:
Place the plastic pot in the decorative container.
Peel off a cluster of Spanish moss and press it around the sides of the container, making sure to conceal the plastic.
Things to note from my experience:
Spanish moss can be quite messy and dirty, so beware. But it is ultimately so easy to work with. Good to always have handy!
Ferns fill cast iron urns decorated with Spanish moss as a centerpiece idea
Here you can see the plastic pot peaking above the lip of the urn.
Clumps of Spanish moss are easily tucked around the plastic pot to conceal it.
Other Table Decorative Accents
These nature-inspired decorative accents will enhance any of the centerpiece ideas.
Image: Cathy Graham
Dot the table with spring vegetables, such as a bunch of white asparagus (option to tie with a satin bow), pea pods (some of them open), radishes (some cut in half).
Image: Leah Lane
Place an egg in a napkin on a place setting. Fold a napkin and tie it with a ribbon. Put an egg – a decorative one or just a plain brown egg – in the nook of the napkin.
Image: Marisa Daly
Place a small vase with a few flowers at each place setting. Choose a simple, wild flower like queen anne’s lace, or delicate flower like miniature daffodils or snowdrops.
Image: Tat London
If you happen to have saved a birds nest one year, place it on the table, filled with chocolate eggs painted to look like robins eggs.
Image: Sense of Spencer
Create a place card holder out of a terracotta pot. Stuff a mini terracotta pot with moss, then tape a place card to a stick and stick it in the moss. For more detailed instructions, click here.

